
After making the gorgeous Large 3D ornament I want to find something a little smaller to go with it. I found a great idea here. If you have problems with my introductions check out hers. ;)
I am using my favorite scrap booking tool. The Kiwi Lane templates to make these fun little gems.
Supplies:
Kiwi Lane Tiny Holiday templates
Double sided paper, scraps will do. I used Basic Grey Jovial
Ink, scissors, glue stick, hole punch, twine or ribbon for hanging

For the tree and snowflake you will need to flip them when tracing to get a full image. Trace and cut 3 of each image. In the above link she used 4 but I only used 3 so that I can fold them for storage.

Again, I only used 3 pieces and left this side unglued so that I can fold it like this to store easily. If you are not worried about storage use 4 pieces and glue all the sides.

Fold each piece in half. Two with one print up and 1 with the flip side off the paper facing up.
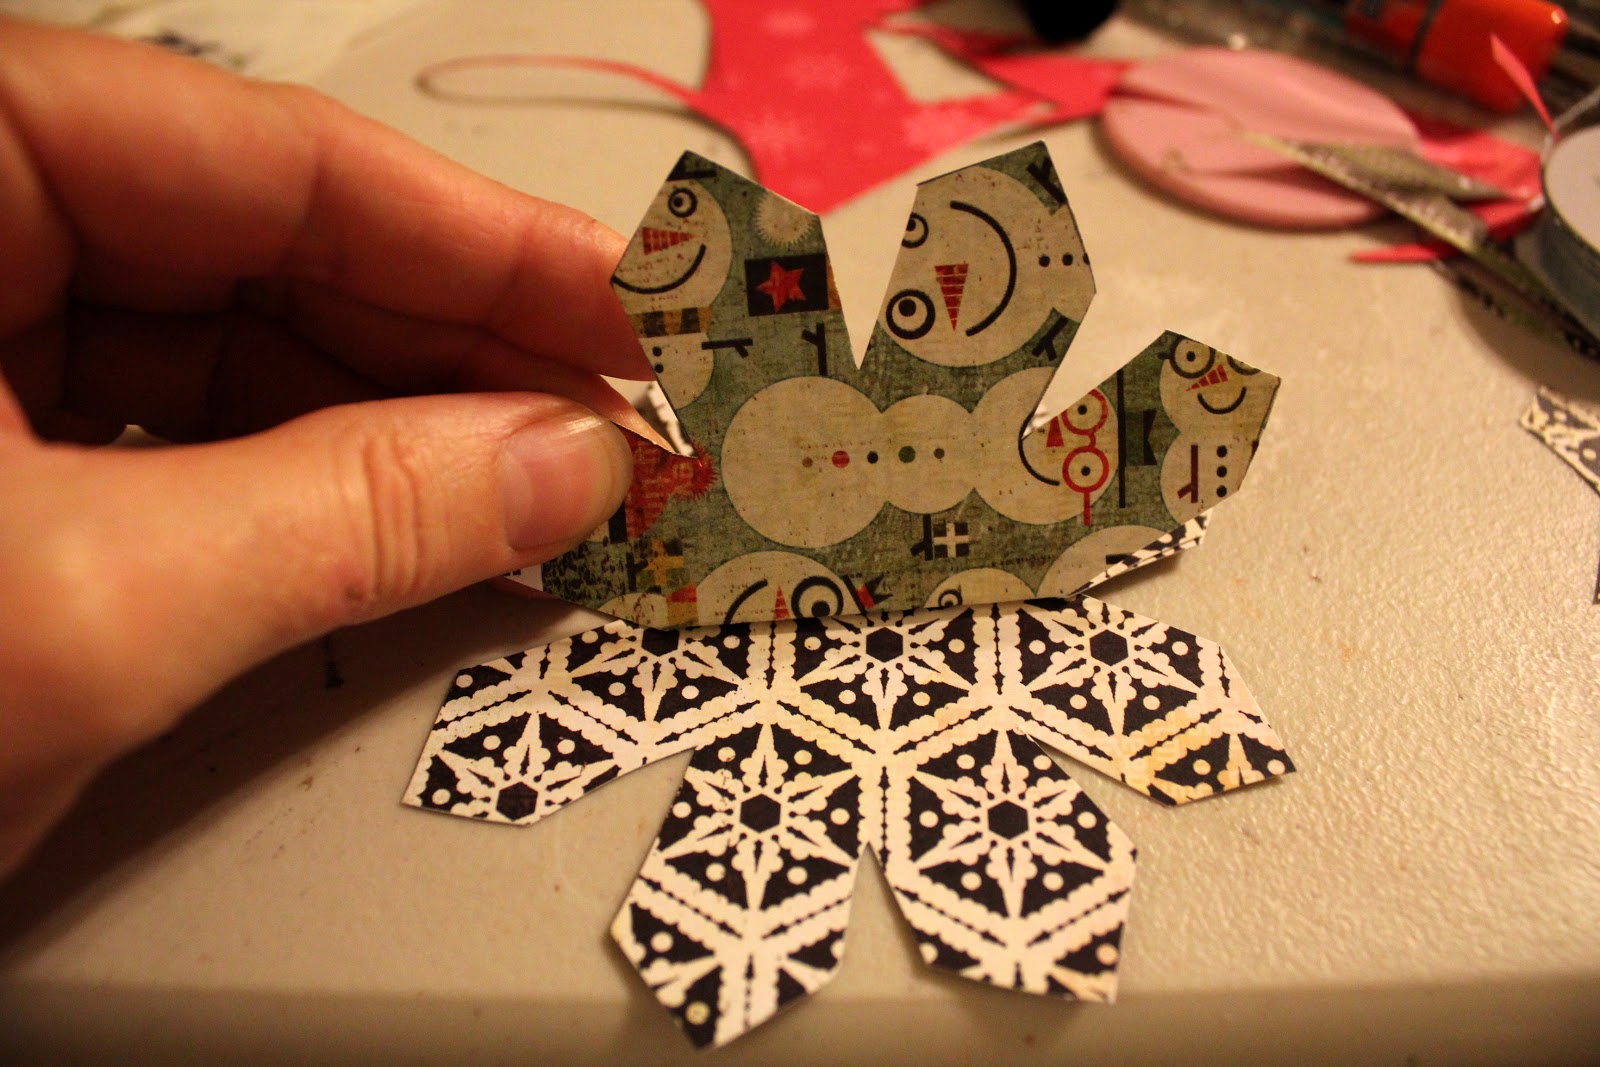

First lay one down flat and then place the other 2 on top. Before glue make sure all side have the prints lined up how you want them.

It might throw you a little, but you are only using 3 pieces, gluing 3 sides and
leaving one side unglued. In this picture the black snowflake print where my fingers are is your fourth side. DON'T GLUE IT TOGETHER.

This is what the unglued side looks like when open.

Ink and trim, if needed, all of the edges. Punch a hole for hanging. NOTE, when punching the hole fold the ornament so that the 2 sides that are glued. (not the one left unglued) are open and punch in the fold about 1/4 of inch down.
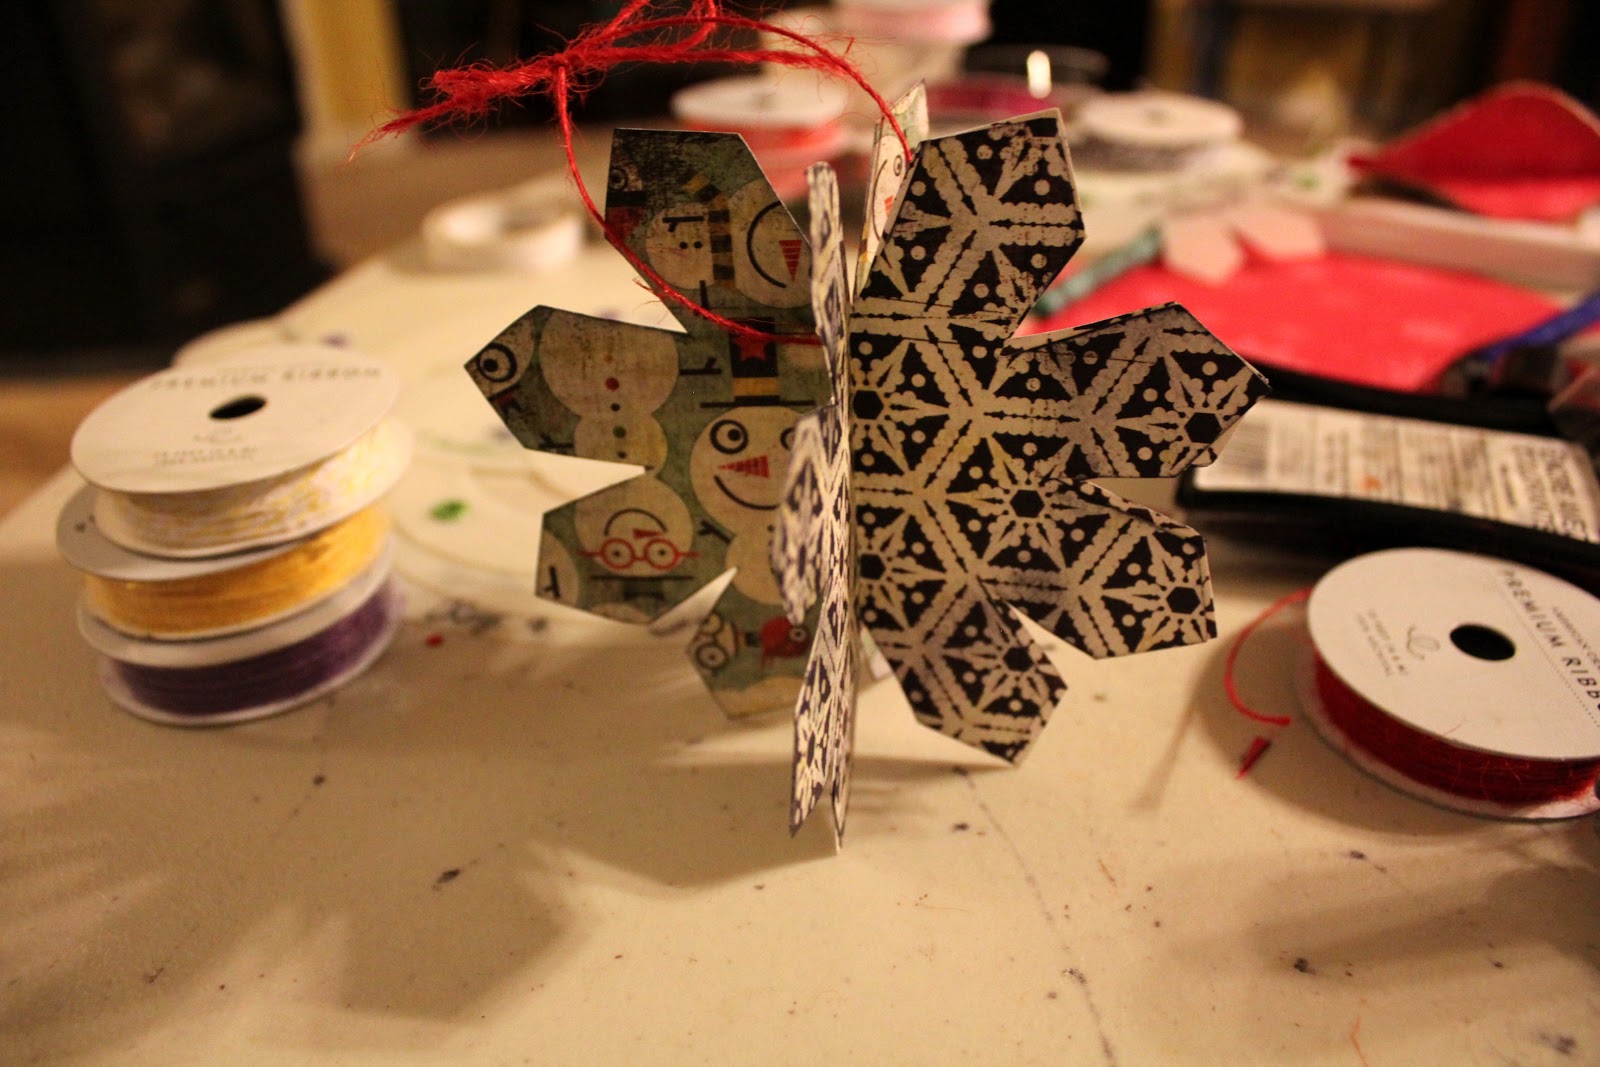
Attach ribbon or twine.

Continue with as many shapes as you like!
With the tree I did not glue all the way to the tips because I liked the added texture. I even bent the tips out a little more just for fun. ENJOY!
No comments:
Post a Comment